
If it’s your homeschooler’s first time using an AI generator of any kind, explain what a prompt is – a translation of sorts between ‘human language’ and ‘AI language’: The software/programme acts as the translator; translating instructions written in simplified code by the user.
This article from Midjourney is an easy to use guide to use a as a ready-to-go lesson plan. Using this as a lesson plan introduces homeschoolers to the concept of prompts for AI images and gives a brief introduction to writing AI prompts.
By the end of the short article, homeschoolers will understand what a prompt is and have a brief idea of how to write one.
A quickly written fill-in-the-blanks exercise is a simple way to test a pupils comprehension:

- Recap the code needed to write a prompt into Midjourney: Homeschoolers only need to remember that prompts must begin with the code:
/imagine prompt
Anything typed after that will be used as the prompt so as an introductory lesson to AI image generating, this would be enough ‘code’.
- Write (on paper) 5 prompts: Choose any prompts you’d use with homeschoolers in an art/writing lesson
Starting lessons offline makes sure homeschoolers are engaged with the lesson as in a classroom – they sit and interact with the teacher (you) to ensure they understand the lesson objectives and are able to ask any clarifying questions.
- After learners have written their prompts (a short-burst handwriting exercise), look at the prompts together.
Encourage homeschoolers to add extra description/clarify the prompt. Midjourney has another resource that can be used as a ‘writing a good prompt ‘ lesson to encourage learners to write more detailed prompts and to think about the output they are expecting from the AI:
- What style of image am I hoping to generate?
- How would I describe that?
Encouraging home learners to explore how to write a good prompt makes for a fuller, more comprehensive AI image generating lesson.
To include an extra writing lesson, offer homeschoolers an extension exercise to rewrite their prompt as a description (in a story/a travel brochure etc).
- Choose a prompt and type it into the MidJourney Prompt Helper
Combining MidJourney AI image generator with the Midjourney Prompt Helper makes for a more productive lesson – if the objective is to achieve a piece of AI art and not to learn the commands. The Prompt Helper does the coding part for you.
- Point out the code the Prompt Helper AI is converting their selections into
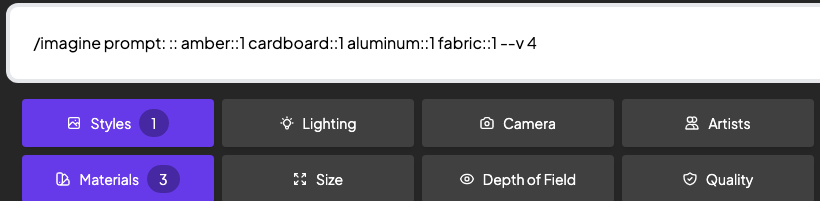
The style is ‘amber’, materials are written as ‘1 (material) ::’
- Memorise the Prompts
Learning information off by heart is an important skill for home learners to practice. Adding memory tasks into homeschool lessons adds additional skill practice into a home-ed day.
- Start a ‘code book’
Writing new information down is a good memorisation technique. Encouraging homeschoolers to write down AI prompts helps them actively memorise the prompts. Using a specific notebook just for code language is a fun way to help learners create their own revision notes to refer back to later.
- Focus on the art
Combining AI art with ‘art’ as a subject is a good way to show students how online and offline worlds can complement and support each other: This would be a good point in the lesson to talk with older homeschoolers about the ethics of creating and using AI art. This article presents some interesting conversation topics.

If your homeschooler has chosen a MidJourney prompt style that imitates an artist, combine the AI lesson with a more in-depth study of the artist and/or a practical art lesson replicating either the AI generated image or a piece by the artist.
Round up the lesson offline
Just as starting the lesson offline actively engages learners with the task as a classroom activity, rounding up the lesson with an offline activity works to clarify, summarise and recap what’s been covered in the lesson.
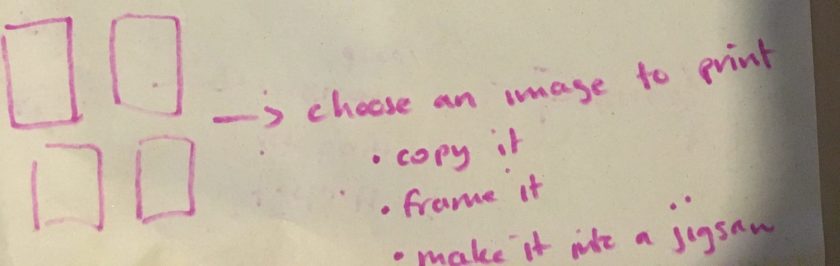
Ask homeschoolers to choose their favourite AI generated image:
Use it as an art lesson and ask homeschoolers to copy the image (allowing them to choose the art medium themselves)
Celebrate the artwork!
Even if it’s simply putting their artwork on the fridge, displaying schoolwork pupils are proud of is a good form of passive encouragement that works well for home education.
- Make a frame: Combine the activity with a nature walk and collect sticks/shells/leaves to make a frame for their completed artwork or make a removable art gallery in the ‘classroom’ using washi tape and Blu Tack.
- Compare the art produced by AI and the copy made by the homeschooler. Art Class Curator has an excellent lesson plan to guide home educators through using the SPARK Art Criticism Steps with learners.
- Make the art into a jigsaw
Using an online puzzle maker is a fun way to finish school lessons and the puzzles become classroom resources that can be used for revision purposes at a later date.
Take homeschooler’s artwork and make it into a jigsaw puzzle using an online resource: most are as simple as uploading an image and choosing how many pieces the jigsaw should be.

Because online puzzle makers allow you to choose how many pieces the jigsaw contains, this is a great peer-peer activity to use with multiple students in a home-ed classroom.
Older homeschoolers can be given a simple image split into more pieces to make the activity more challenging, and more complicated images can be simplified by reducing the number of jigsaw pieces to make the image suitable as a jigsaw puzzle for young learners.
Using an online puzzle maker means the completed puzzle can be shared directly into Google classroom meaning homeschoolers are actively contributing to the creation of home-ed resources, which is always a positive thing.

If you don’t use Google classroom in your homeschool, encourage sibling homeschoolers to share activities and resources they create with each other via email or by printing out the puzzles to complete offline – either print onto paper and stick the A4 onto a piece of card before cutting out the pieces, or print directly onto thin card and laminate.
These student generated activities are perfect for grab-and-go lessons.