Helping learners improve handwriting
“Why can’t I just type?” Anyone else heard that question from a kid struggling with handwriting? It’s a logical question and thankfully, there’s also a logical answer: at some point in your life someone will need to read something you’ve written and you’ll want them to understand.
Handwriting is one of those skills that is easier to improve on if the association to it has always been positive. For parents whose children are learning to write at home, this is easier: handwriting can be a game, ‘writing’ can mean a letter to a sibling or treasure-map clues or a shopping list for snacks they want to buy. For parents whose children have been stung by handwriting being a skill they can pass or fail in school, the task of asking them to practice is harder. First you need to disconnect the task from the failure mode — and crucially, from writing itself.
Writing and handwriting are not the same skills. Writing asks the child to think about and use words; handwriting asks them to produce the words, using motor skills and a second strand of cognitive skill: letter formation is both a memory-recall and physical task. Being assessed on handwriting as well as the content of the writing, or being asked to produce both at the same standard in the same task, can be daunting. Separating the skills helps. Writing becomes about the words and the usage, assessed on its own merits; handwriting is a separate skill, marked not with red pen but with progress they can track themselves.
In this post
Make sure they’re comfortable!
Handwriting can be surprisingly uncomfortable until you get used to it, and more tiring than we tend to think. Building up stamina, via practice, is important if you want handwriting to be legible at the end of an essay as well as in the intro paragraph. Improving fine motor skills helps develop finger strength, dexterity, and control — all of which help with handwriting. Model building, origami, playing an instrument, typing (yes, really..it builds finger control) and full-hand tasks like kneading dough or hole-punching cardboard (a surprisingly popular activity that doubles up for art) all strengthen hands and fingers which make holding a pen for prolonged periods less physically tiring.
Writing on a ~20° incline changes wrist position for everyone. It reduces the “hook” of the wrist, which makes it more comfortable, reduces fatigue because the hand is literally more comfortable, and the incline also improves line control which instantly makes writing neater. An easy way to try this at home is to use a 3-ring folder (the ones with the big metal rings inside), or buy a cheap slant board.
Figure out the problem first
Messy handwriting isn’t a one-stop shop. There are three main problems: formation (letters are the wrong shape), fatigue (gets worse the more they write), or speed (the writing is fine when they write slowly, bad under time pressure).
If the problem’s the letters themselves, make them HUGE! Letter formation requires kids to learn the motor pattern movement for each letter. Writing the letter with their WHOLE arm, on a whiteboard, in the sand, one letter on a piece of A5, helps encode the muscle memory which shrinks with the paper. For younger learners, it’s a way of disconnecting the act of writing from the environment of learning..it’s the opposite of sitting at a table. For older tweens/teens, it’s an activity that’s so utterly uncool it passes as acceptable.
Ask them to describe outloud how they’re drawing the letter (eg.”down, round, through, don’t lift”), repeat 4/5 times HUGE-BIG-SMALLER-NORMAL. Slightly silly, usually effective: one letter at a time.
Take the pressure off
Copy work is the most commonly used handwriting activity, and it can be effective, especially when the text itself engages the learner, but its purpose is always visible. The pupil knows they’re practising handwriting, and that knowledge creates pressure. A useful workaround is to make handwriting incidental to something else. When the goal is to make game cards, or create revision flashcards, or to illustrate a poem, the learner’s brain is focused on the outcome and that outcome is not a score. The game can still be played even if the handwriting’s hard to read. Revision flashcards subtly generate a rewrite themselves without any input from you because the point is that they can read them, and illustrated poetry or a song they like is less about the handwriting than the overall finished piece.
There’s also a physical reason this works. Emergent/new writers tend to grip the pen too tightly. When they know the handwriting is being assessed, they’ll grip even tighter still. When the focus shifts to the content — what they’re writing rather than how — fingers loosen, the pen moves more freely, and the writing actually improves. Comfort with holding a pen comes through use, not instruction. If you can find a no-pressure way for practice to happen, improvement is almost inevitable because the hand movements become familiar, not something to focus on.
Flashcards
Making flashcards is a practical, no-prep activity that pulls double duty. Students naturally try to write clearly because they know they’ll need to read the cards back later — but the pressure is self-generated rather than externally assessed. You’re checking whether they’ve recorded the right information, not marking their letter formation.
Flashcards work across subjects: dates, names, and places for history; vocabulary for language learning; grammar rules, science terms, maths rules. For revision purposes, a useful extension is to have students handwrite cards they’ve already created digitally on Quizlet (and if you have a child who’ll question why they need the duplication of an already created revision card, a University of Tokyo study found a positive correlation between memory retention and physically writing on paper, if you want to support your double-practice point).
Illustrated poetry
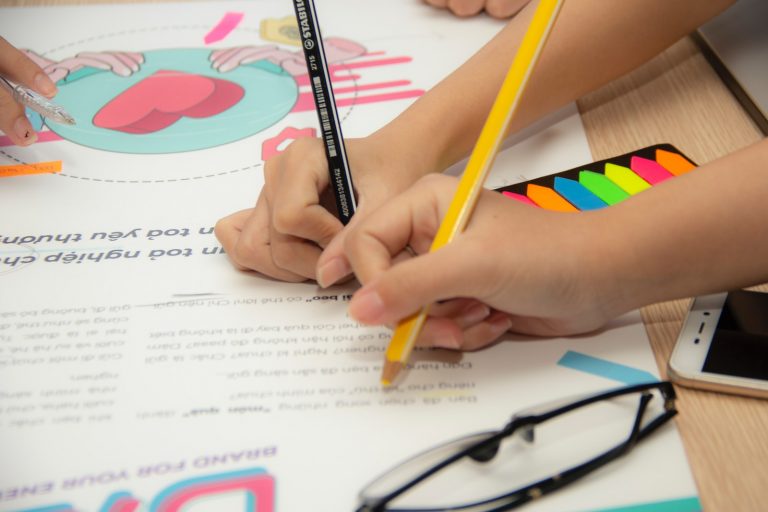
Illustrating poetry is one of my favourite activities to do with learners of all ages. It genuinely is a multi-age activity that helps master many skills. You can focus on the poem itself — on copying, analysing or creating — on the art, or the connection between the art and the words. It can be practical or philosophical or simply just something fun for beauty’s sake. What’s great about using illustrated poetry as a handwriting tool is that the goal is to create something visual. Handwriting doesn’t have to be the centrepiece. Students who are focused on the aesthetic result — where the words sit on the page, how they work with the image — are often less tense about the writing itself. Any writing medium works: let them experiment with hand-drawn fonts, use a quill, bubble-write text. The idea is to make the act of writing fun not stressful.
Comic strips
Comic strips give learners a license to experiment. They can play with letter size and case, break grammar rules, use speech bubbles and caption boxes. The writing is purposeful (it tells the story) but the standards applied to it are different from a formal writing task. This makes comic strips particularly good for learners who find traditional handwriting practice demoralising or boring, and is especially useful as a way in for older learners who can be reluctant to practice handwriting, knowing they could simply type: in a comic strip, the writing is part of the point, but isn’t tasked with carrying all of their vision.
Translation work
With translation, the cognitive load is on working out what to write. The handwriting is the vehicle, not the subject. Clarity still matters (learners can’t read back what they can’t decipher), but there’s no sense that the writing itself is under scrutiny. If your learner isn’t studying a language, try translating writing from or into different accents, time periods (old-modern), or from street-speak slang into formal talk-to-gran language. Anything works. Rap, too, if that’s your kid’s thing (can you tell I’ve been there before?).
Spelling, not handwriting
Similar to translations which work by shifting the goal of the task, offering a handwriting task as a spelling exercise works too. When students are focused on getting the spelling right, they stop overthinking letter formation, and the writing often comes out better for it. A list of tricky spellings/unusual or funny words makes a short, double-duty activity that doesn’t feel like handwriting practice at all.
Practice like a calligrapher
Calligraphers are obviously experts at this, and calligraphers, like athletes before a race, warm up before starting to write. Following specific patterns, professional handwriters start handwriting exercises with drills. If this framing might appeal to your learner, there’s a letter writing drill sheet here.
Scaffolded writing paper
Sometimes the simplest solution is the original solution. Disguising the task isn’t always the right approach to take. Some learners will be aware their handwriting isn’t as legible as they’d like/ it needs to be and are open to working on it. A podcast in the background and different handwriting papers, with the goal of one perfect word or even a letter, is sometimes exactly what the learner needs. The background audio removes the pressure from the task, the scaffolded lines on the paper help the flow.
For early writers: lined paper with tramlines — guides that show them where the shapes of the letters should sit — helps by reducing the thought process. The guides hold the size of the letters, the child only has to think about the shape. Starting with slightly larger than normal spacing makes it easier while their pincer-grip develops.
For more experienced writers: Plain lined paper works; lined paper without margins tends to work better.
Seyes, or ‘French-lined’ paper, is a different approach that sometimes works well with older learners, or with children learning cursive — partly for the novelty aspect, partly because the paper itself holds the sizing, like the tramlines do for younger learners. It looks complicated, but the formula, once they’ve learnt it is simple:
- Capital letters to the third line
- The bodies of lower case letters (circles in b, p, q etc; the letter c) fill the first line
- Stems of letters like l, b, h stretch to the third line
- Letters that loop below the line (p, q, y — f & z if that’s their handwriting style) drop down two lines.
For some learners, alphabet practice using Seyes paper as a busy-hands activity while listening to a read-aloud or podcast can turn a skill-practice drill into a meditative, repetitive activity that does almost passive improvement work on handwriting.
You can download a lined paper handwriting pack here.
Print or cursive
If you’re home-educating, whether you teach your child print or cursive is entirely your choice: there’s no right or wrong. When starting to write, print is obviously easier: letters are formed individually, mistakes can be corrected one by one and repetition of letter sizing is easier with single letters. If your child is comfortable with printing letters and can write at a speed that keeps up with their thought flow, it’s fine to stick with print. For lots of people, learning cursive, while an extra step initially (start when their printed fluency has developed) helps them write faster with more fluency, and develop a handwriting style that is uniquely theirs.
Outside support
Just because you’ve opted for home education doesn’t mean you have to figure out all the challenges of teaching your child yourself. Handwriting might be one of the areas you need help with, and that’s no different to outsourcing science lessons or using a guided online course for maths.
For children who need support with handwriting specifically, Help with Handwriting offers online classes built around short-burst practice and a one-to-one teaching style. If you feel your homeschooler needs extra help outside of what you can give, Help with Handwriting‘s Get Set Write Club might be what you’re looking for.